By Olivia
Crinkly, autumnal leaves and crafting gave me an idea for creative place cards for your guests. These are super-easy and fun to make, especially with the family. Hope you like this simple project idea.
Materials:
- Cardstock paper in any shades. I chose earthy brown and reddish bronze colors from a palette of natural, autumn hues.
- A ruler (optional). Place it against the paper and use a pencil to draw your finest lines.
- Safe but effective scissors (optional). These are easy to acquire and are a basic crafting necessity.
- Natural feathers, leaves, sprigs, twigs or other nature. These are easily found in backyards. Turkey feathers are lovely with their rainbow of brown and gold stripes. Leaves can be found in beautiful shades at this time of year. Sprigs and twigs can be yanked off of trees and bushes, but the discarded ones on the floor also have a gorgeous outcome. Other nature, like pretty stones or dried berries, will also make perfect touches to your place cards.
- Crafting glue. Any glue works but squeezable form is best for tidy, well-placed work. If you desire clean work, use clear-drying glue.
- Markers, pencils, paint (fine paintbrush needed for this) or crayons. Anything that will make a visible line is welcome. With all of the color coming from the paper and natural materials, black and white are the preferred colors. Paint makes the smoothest most legible line, I’d suggest using it for this project.
- Pencil and eraser. If you truly do want those precise letters, write in pencil and then trace over in ink or paint or final coat material.
Process:
- Fold your paper into a place card by matching the opposite ends together evenly. You can do this any way you want. The scissors can come in handy if you wish to cut them into different shapes or sizes. I cut mine into a tiny one.
- Without gluing anything, plan your moves. Decide where to place everything. Practice writing the place card owner’s name on the card. Consider different writing styles (block letter or cursive) if you’re bold enough. I like a cross between cursive and plain writing, it’s easy and elegant. Each place card should have a name and an autumnal touch added to it.
- If you like your plan, proceed. Do this carefully, you don’t want to mess up your place card. Use thin lines of glue on the back of your accessory and gently press it onto the place card (the edges and sides are best). Write out the person’s name on the card with your desired ink. If you’re confident, get fancy and use cursive and curls. If it seems plain, draw or glue. Add anything. Spark up your cards in any form you want.
- Let them dry. If you are doing this in a hurry, fan them with a container lid. The drying process depends on what brand of glue you’re using.
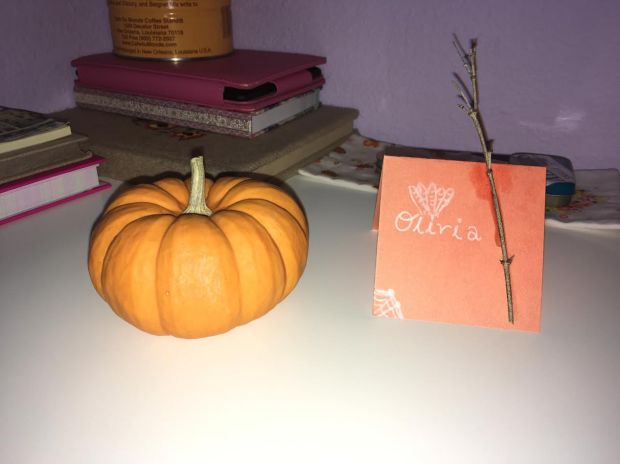
- Set your beautiful place cards up! Place them in front of the guest seats and make sure they know you made them. Show them off, boast about them, anything because they’re so creative and rustic on the dining table. Little pumpkins or autumn flowers in vases can go beside them. I have a darling little pumpkin that I just added as a touch to my seat at the table and I plan to bring it to my desk very soon. Place cards make a lovely touch and your guests are sure to notice and compliment them.
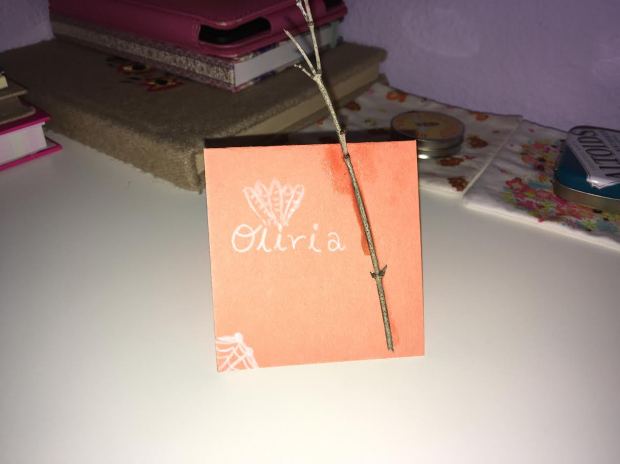
A picture and note on mine:
I made mine for my desk, having a severe lack of pretty and festive foliage in my own backyard. I found a cool twig and decided to go with that instead of spending depressing hours outside, begging for a Pinterest-worthy backyard. I added turkey feathers behind the first few letters of my name and a cobweb in the bottom left corner. The twig is pasted on the right corner in a slightly uneven, more authentic way. I’m glad I chose something that won’t rot because this is actually very pleasant. Also, I cut the paper so that I could have a mini card because all miniatures are adorable. Its cut a bit uneven due to the nature and adventure feeling you get from a slightly lopsided cut.
Thanks for reading. I bet your cards (go ahead and make them!) are absolutely wonderful. You can tell us if you make these (and how they turned out) in the comments section below. Thanks again!
